
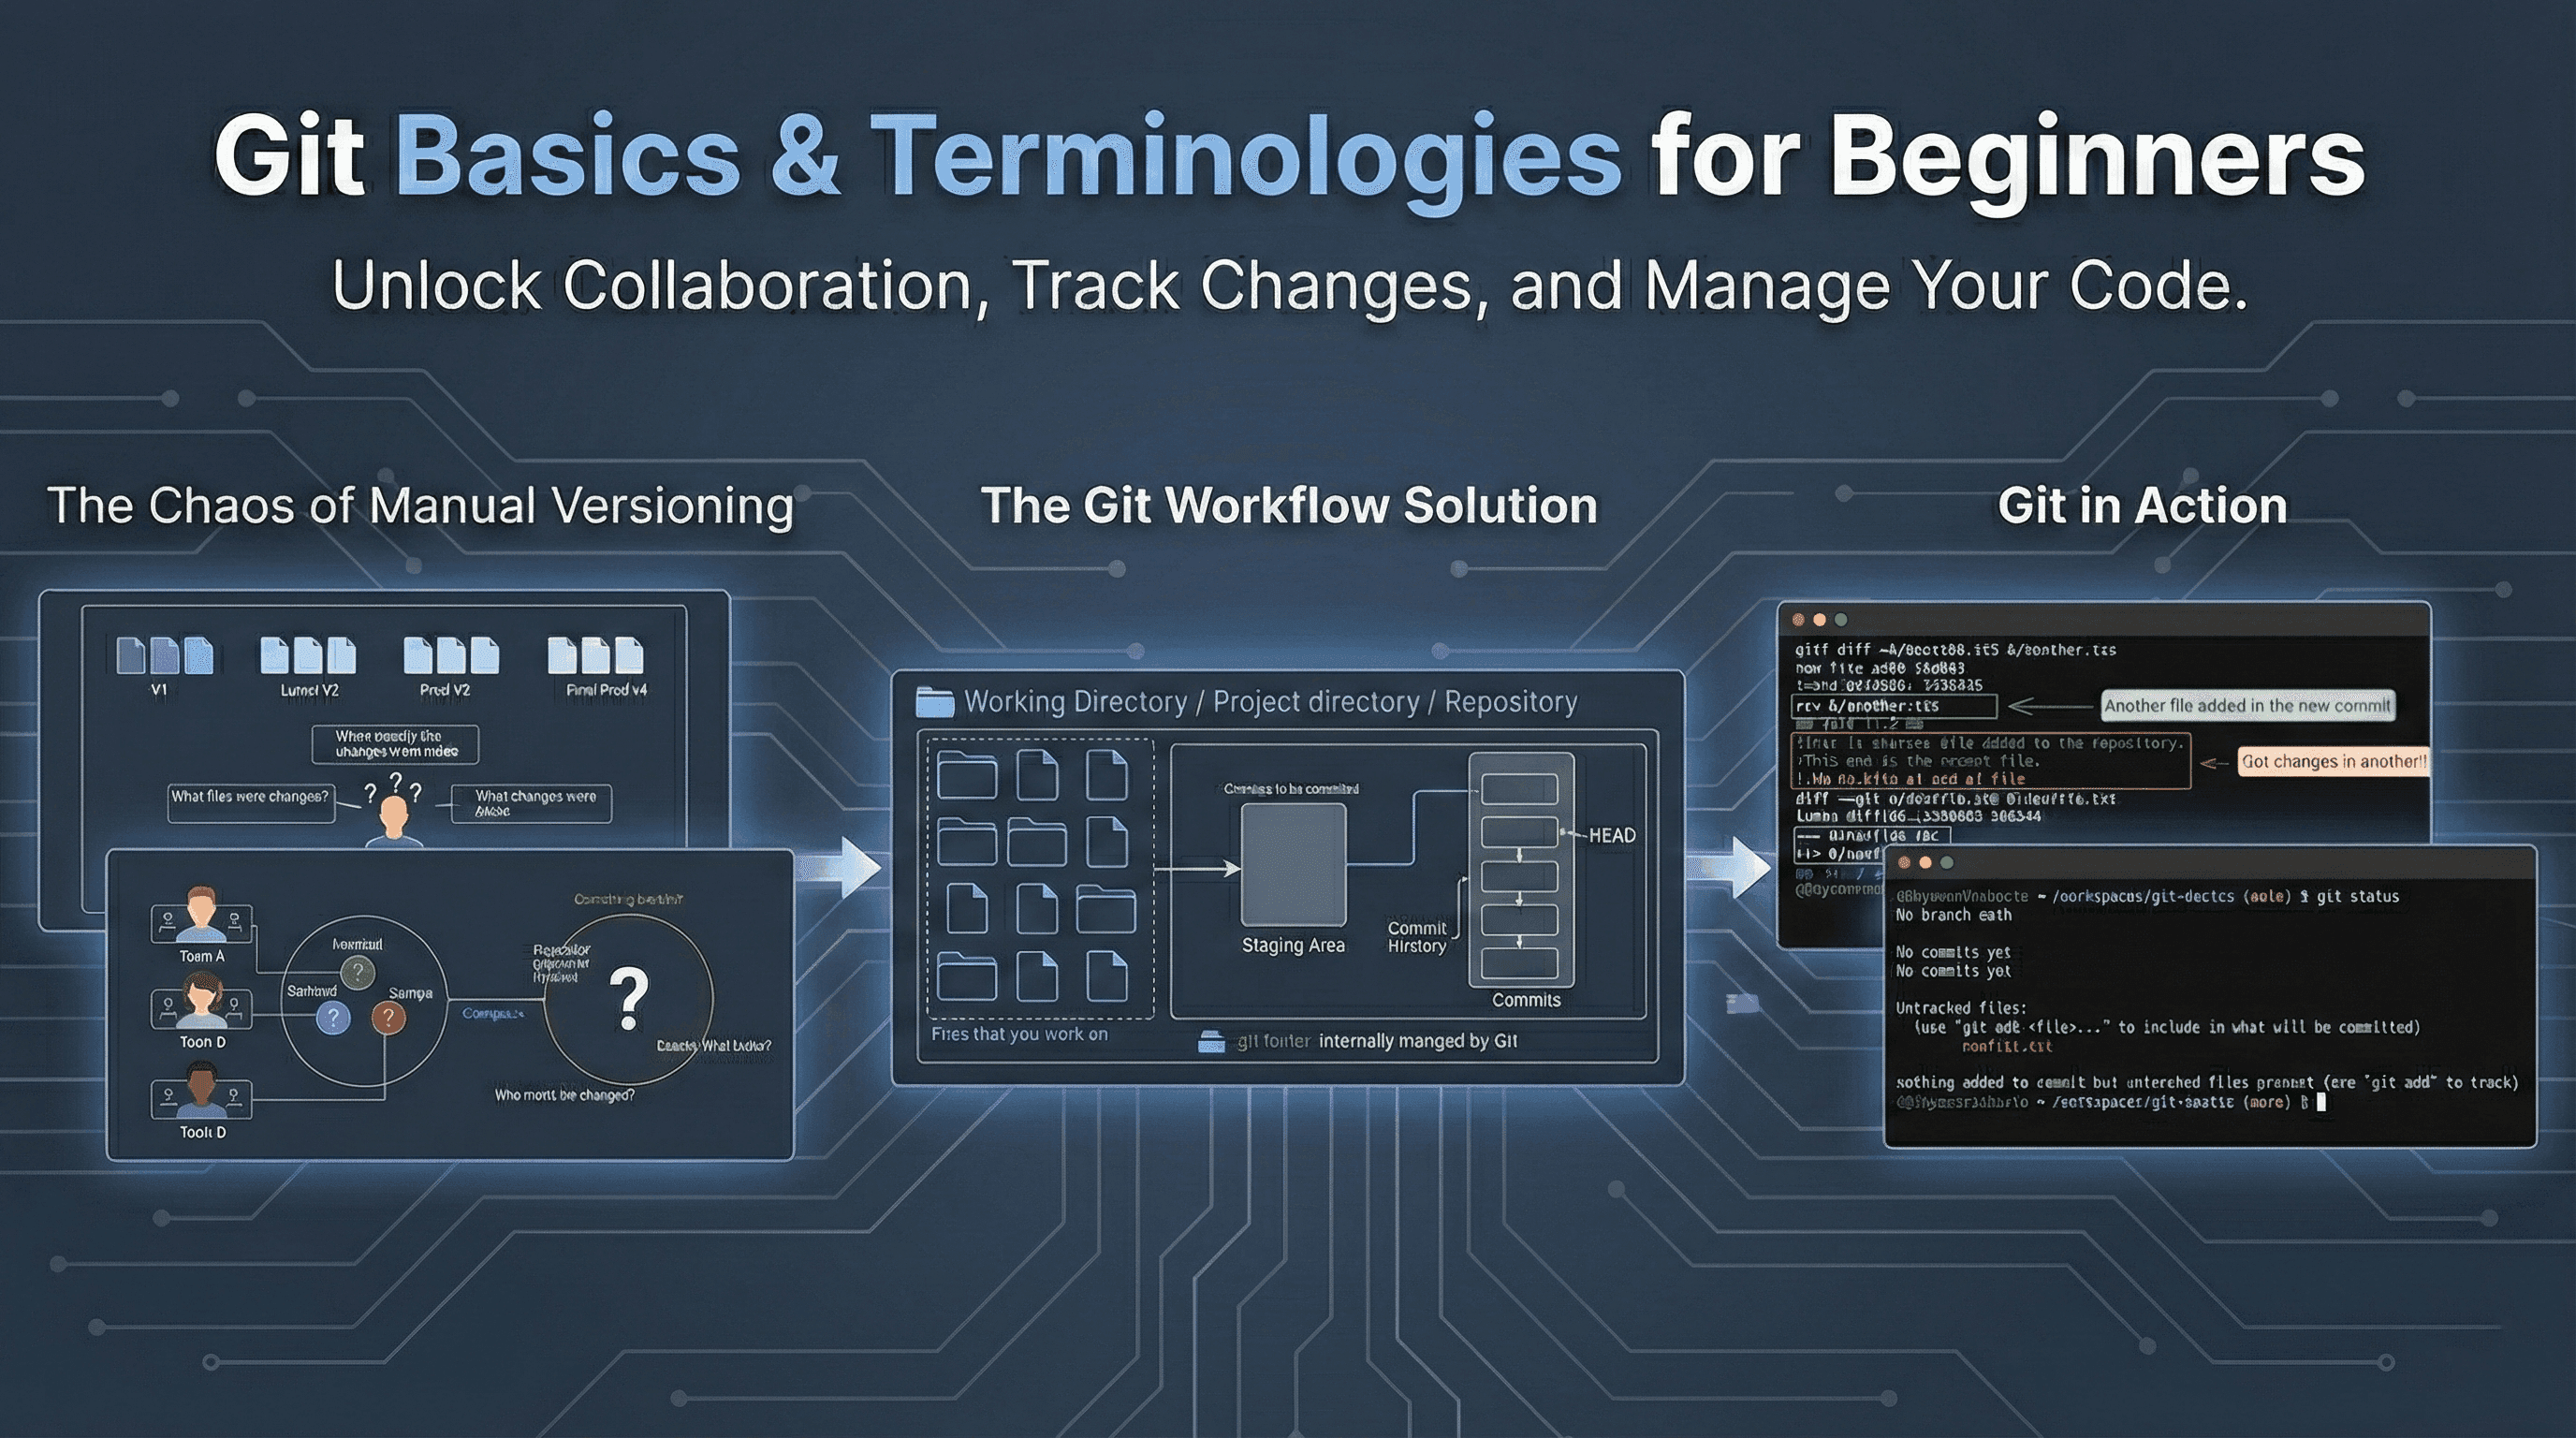
Git basics and terminologies for beginners.
What is Git?
If you are new to Git or version control in general it may seem daunting at first but trust me once you really understand the basics of Git, then Version Controlling using Git will become your second nature. Let’s keep it simple and focus on one step at a time.
Git is a free and open source Version Control System, that’s it. Now what is a Version Control System you may ask? It is a tool that helps you to track changes of your work across the whole working process. Simply Git allows you to store multiple snapshot of the changes you make to your work. Each newer snapshot contains some newer changes that were made after previous snapshot and link to it’s previous older snapshot of changes. So that you can easily undo redo or edit those changes.
Git enables multiple developers to work on the same project in their own machines simultaneously while contributing and sharing the latest changes with each other seamlessly. Each contributor work on and make changes to their version of the project and share the newer snapshots or commits with the rest, who then add that newer snapshot or commit (Sometimes multiple commits) into their local copy of the project and continue working with the newer version. Git also allows us to detect and resolve conflicts between two different commits made by different people.
That is all a Version Control System essentially does. If you want to understand VCS (Version Control Systems) in more depth then read this article that goes in detailed explanation of what a VCS is and why it is required in modern development. But you don’t have to worry about it too much to understand essentials of Git and from this article you can easily understand the basics of it.
Before we go all in with what is Git and how it works and all , let’s first understand why should we even concern ourselves with something like Git at all. What features Git offers that you should consider investing your time and energy to learn a new tool and it’s terminologies? Why should you even consider using Git in your projects at all?
Actually there are multiple crucial and unavoidable reasons to do so.
Why use Git at all?
Where, What and When : When tracking changes with Git the first and foremost benefit you get is every snapshot that you ever make in your project is visible forever and can be identified later on no matter how big your project grows. Each and every change that you commit will be marked in full details as in Which files were changed, what changes were made exactly and when the changes were added permanently (committed) in essence the exact date and time the changes were committed.

Git solves that.
By Whom : Each commit also stores who authored it or created it. This might seem like a small addition but in real world development processes this can be a life saver, In bigger corporations teams of multiple people work on the same project and sometimes each team working on a specific part of the projects consists of multiple developers or experts. And in that scenario this detail makes co-operation, collaboration and teamwork a lot better. Especially it helps pinpointing source of the problems easily.

Git solves that too.
Branching: Git allows you to keep more than one parallel version of the project. This feature is actively utilized to test new features without tampering the main working files, fix bugs, roll out updates and provides other convenient and quality of life experiences for the developers.
You can create a branch from any snapshot or commit of your project and you can merge branches to your main branch to integrate changes created in that secondary branch to your main branch and this is a popular technique that is actually used to develop and test new features without breaking the whole product or features at the consumer’s end.
Rollback and Revert : Git allows you to revert changes by switching to an older commit as working state or current state of the project and create a branch or make changes on that branch directly. This feature gives us a superpower to go back in the timeline of our project and fix mistakes or even diverge in a different branch from that exact point with a totally different timeline or simply undo any errors.
Real world Collaboration: Git is distributed Version Controlling System or simply said a distributed tracking tool. It not only allows a group of people working together on the same project, individually and locally, track and control their work but also it can act as a centralized hosted service that tracks changes made by everyone involved and working on the project in one place. Github, Gitea and Gitlab are just few examples that host the projects that are using Git on their remote server using this feature of Git.
Brief History
Git was created in 2005 by Linus Torvalds, a Finnish programmer who is most popular as the creator of Linux kernel since 1991. After facing problems from proprietary Version Control Systems he created his own Version Control System to maintain the source code of Linux and named it Git.
“Since its birth in 2005, Git has evolved and matured to be easy to use and yet retain these initial qualities. It’s amazingly fast, it’s very efficient with large projects, and it has an incredible branching system for non-linear development“ - Official Git Docs.
Basic Git Terminologies
Before we go ahead and jump into all the fancy commands of Git, let’s first understand few key terms and words used in context of Git and version controlling in general. So that when we finally start learning Git, it would be a lot easier for us to do so without being confused in all the fancy jargon.
Git Repository: A Git repository is basically the workspace or the Project root directory or folder that is actively being tracked by Git for new changes. In the next section we will see how to setup our project as a Git repository or repo in short. This repo contains your project files and the .git folder where Git stores all of the internal files and folders used to maintain the Git repository.
Tracked files: As you can probably tell already that this refers to all the files that Git is actively tracking for changes and if any of these files are changed Git will tell you that they were modified. Yes if you create new files in your Git repo Git will not track them by default but report that they are untracked and need your attention. To actually track untracked files and changes in those files you must first tell Git to track it manually.
You can also create a “.gitignore” file, the file and directory names written inside this file are ignored and not tracked by Git.
Staging area: After you tell Git to track a new file in your Git repository manually or you tell Git to add the changes made to the files that are already being tracked, Git adds them to staging area to commit them, this is the place where all the recently added files and changes live. Git cannot preserve new changes directly. You need to add changes to staging area for Git to be able to preserve them.The staging area is basically Git’s way to know what exact changes will be committed in next commit and Git commits only the changes present in staging area.
Commit: Commit is an action that you tell Git to perform when you want to preserve all the changes added to the staging area. This new snapshot or changes permanently added to the repository is called a commit. Each commit has it’s own id or hash that Git uses to reference them individually. Each commit contains some additional metadata like author, creation date , link to previous commit.
Branch: Your Git repository can have multiple parallel versions that do not affect each other. These versions are called branches each with their individual commit history and different version of the project. Each repository has at least one branch called main. Git keeps the files in your working directory just as same as latest commit in the currently active branch. If you wish to incorporate changes committed in one branch into another you can merge them together.
HEAD: HEAD is nothing but a pointer that points to the currently active branch of your repository and that branch points to the latest commit made in that branch.

Basic Git commands
Initialize a Git repository : To use Git in our project we first need to initialize our project as a Git repository, so that Git can track the changes we make. To do that we use
git initcommand.

It creates a .git repository inside your project folder and initializes you project as a Git repository and looks for any changes made inside the repository. Whether the repository is empty or already have some files when initializing it, this command does not delete anything and only creates the .git folder.
Check repository status : This next command is one that you will use very often. This command is used to check the status of tracking in our Git repository. All the changes that are made will be listed by this
git statuscommand. All the untracked files, tracked changes that are not staged yet and all the staged changes yet to be committed are shown by this command. This command is frequently used to track the state of our repository.

Add latest changes : To add the changes that you made in your repository to the staging area you need to use the
git add <filenames> ...command. This command adds only those files that were given in it’s arguments to the staging area. Once the files are in staging area they can be committed. Also if there are too many files that you want to add to the staging area or do not want to manually add the file names to the command you can use
git add .command too. This ‘.’ at the end of the command means all the files including all the untracked files (if any).

Finally committing the changes : After all the modified files or new files that you want to commit are staged in the staging area they can be committed with
git commit -m "<commit message>"command. Be mindful that the commit message is mandatory and you must provide a commit message to every commit you make or it will fail to commit the changes. After being committed the changes will permanently be listed as a commit in the commit history. Next we will see how to see that commit history.

See the Commit history : You can list all the commits that you made till now with
git logcommand. This command lists all the commits in a stack view .i.e newest to oldest fashion and the top most commit is the last one you made. For each and every commit, in addition to the commit id or hash the Author (the one who made the commit) and the date time timezone (when the commit was made) followed by the commit message are listed also.

See the differences : If you want to see the difference between two commits in your repository to check exactly what changes were made between them you can use
git diff <commit1 hash> <commit2 hash>command. This command displays the additions and deletions to the files across the commits.The commit that has the commit1 hash is treated as base and the second commit2 hash is treated as the newer commit so you need to put older commit hash first and newer commit hash later if you want to see the changes in the correct order.


Reset commit history : Sometimes it may happen that you want to undo one or more commits or simply put those changes back to staging area or working directory, for that we use
git reset <commit>command. This command moves the branch to point to that commit.
Depending on what flags you used, it may permanently delete the changes made after that commit or put them in the staging area or un-stage them completely but not delete them. Let’s understand these flags.
Default or --mixed reset:
git reset --mixed <commit>or simply
git reset <commit>this command (or the --mixed flag) just moves the current branch to that specified commit and removes all the commits made after that commit, but also preserves the changes that were stored in those removed commits. Those changes are not marked for next commit or not kept in the staging area but in the working directory (inside the actual files) itself ready to be staged again.
Soft Reset
git reset --soft <commit>This flag also removes the commits made after the specified commit while preserving the changes made in them. -- soft flag keeps those changes in the staging area or in the index file simply marked for next commit.
Hard reset :
git reset --hard <commit>You need to use this flag with caution and only when you are sure you want to permanently delete all the changes made after the specified commit. This flag not only removes the commits made after the specified commit but also overwrites you project directory to be exactly same as it was in the specified commit removing all the newer changes.
Summary
Above commands are few of the most commonly used Git commands and just enough for you to get started with Git in your projects. Although there are many more functionalities and tools Git offers but if you just use the above mentioned ones you can easily get started with it and then learn as you go.
Git has become a very popular and very successful version control system because of it’s easy-to-use, fast, efficient and very intuitive commands. Due to wide adaption of Git many Git repository hosting services like Github, Gitlab , Gitea, Bitbucket are built around the Git as an ecosystem. Git is an essential addition to your toolbox that will save you from a lot of trouble and will prove more useful as more time you spend in you development journey!
Hopefully you learnt importance and basics of Git from this blog and now will easily be able to start using Git. Thank you for reading.