
Setting Up Your First Node.js Application Step-by-Step
If you are starting with Node.js, the first step is not writing complex servers or APIs. It is understanding how to:
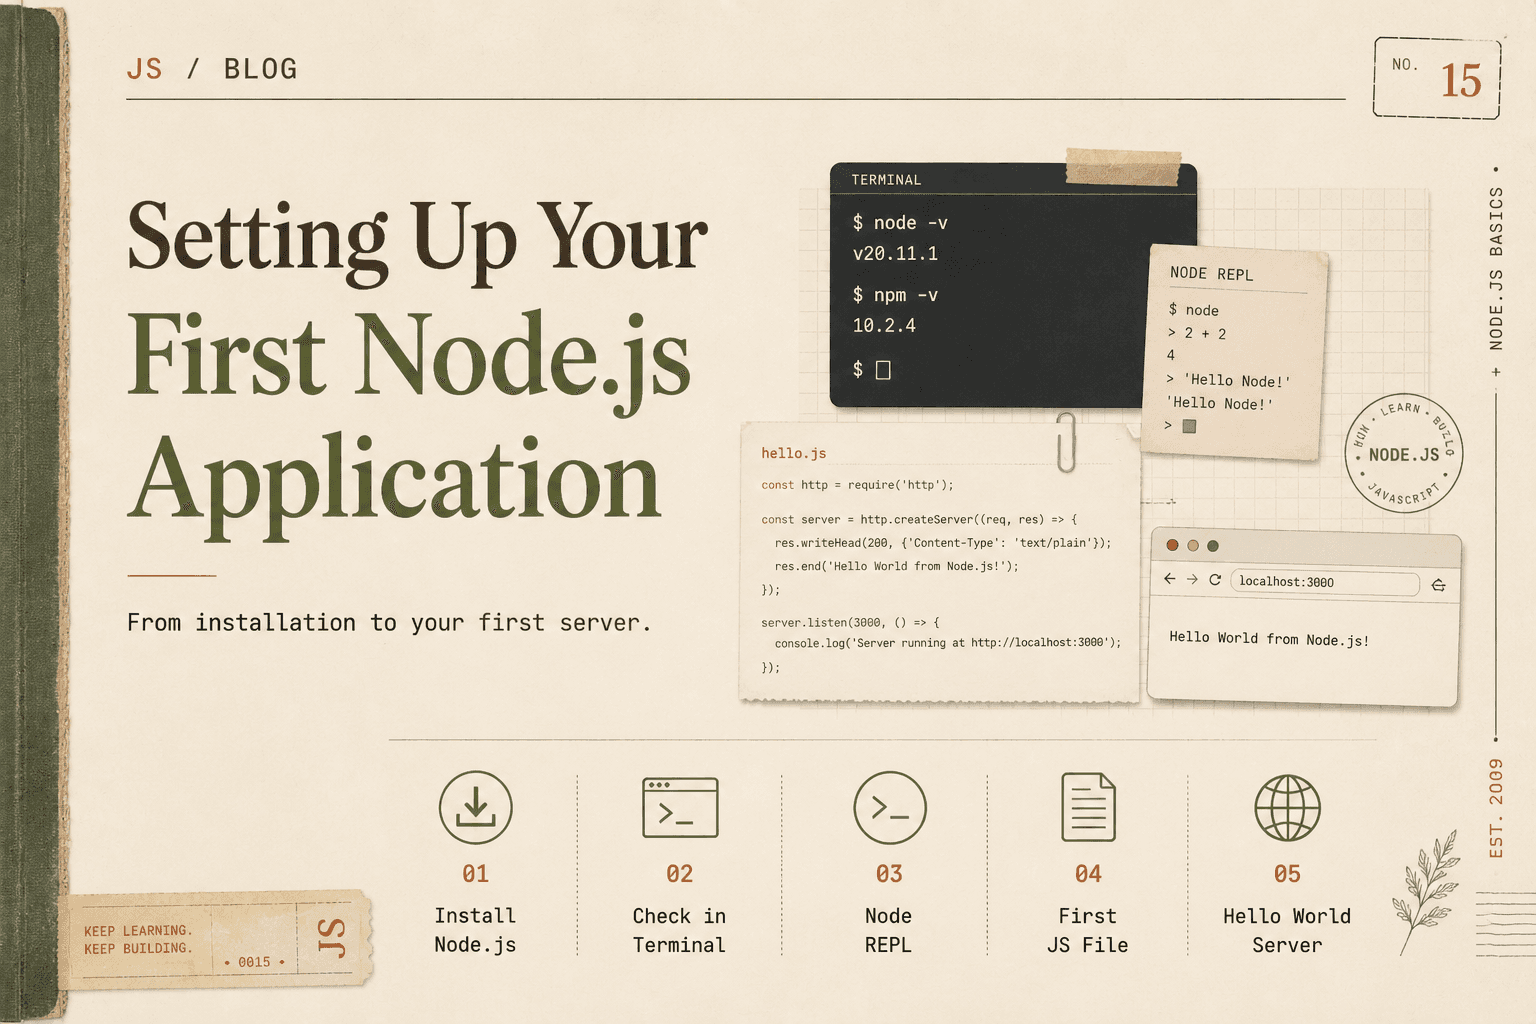
Install Node.js
Verify the installation
Use the Node REPL
Create and run a JavaScript file
Build a simple “Hello World” server
We will go step by step, keeping everything simple and framework-free.
Installing Node.js
Node.js can be installed on Windows, macOS, or Linux. The process is very similar across systems.
Step 1: Download Node.js
Go to the official website:
https://nodejs.org
You will see two versions:
LTS (Long Term Support) → Recommended for beginners
Current → Latest features, but may be less stable
Download the LTS version.
Step 2: Install
Run the installer.
Follow the installation steps.
Keep default settings unless you have a specific reason to change them.
Node.js installation also installs npm (Node Package Manager) automatically.
Checking the Installation
After installation, open your terminal:
On Windows → Command Prompt or PowerShell
On macOS → Terminal
On Linux → Terminal
Type:
node -v
If Node.js is installed correctly, you will see something like:
v20.10.0
Now check npm:
npm -v
This confirms both Node and npm are installed.
If you see version numbers, your setup is successful.
Understanding the Node REPL
Before creating files, let us understand something called the REPL.
REPL stands for:
Read
Evaluate
Print
Loop
It is an interactive environment where you can write JavaScript and see immediate results.
To start the REPL, type:
node
You will see something like:
>
This means you are inside the Node environment.
Now try:
2 + 3
Press Enter.
You will see:
5
Node:
Reads your input
Evaluates it
Prints the result
Loops back waiting for more input
You can also try:
console.log("Hello from REPL");
To exit the REPL, type:
.exit
Or press:
Ctrl + C (twice)
The REPL is useful for testing small pieces of code quickly.
Creating Your First JavaScript File
Now let us create an actual file.
Step 1: Create a Folder
You can create a folder anywhere on your computer.
For example:
node-project
Open this folder in your terminal:
cd path/to/node-project
Step 2: Create a JavaScript File
Create a file named:
app.js
You can create it using:
A text editor
VS Code
Or terminal commands
Inside app.js, write:
console.log("Hello, Node.js!");
Save the file.
Running Your First Script
In your terminal, make sure you are inside the folder where app.js is located.
Run:
node app.js
You should see:
Hello, Node.js!
This means:
Node read your file.
It executed the JavaScript inside.
It printed the output.
You have successfully run your first Node.js program.
Understanding What Just Happened
When you ran:
node app.js
Node did the following:
Loaded the file.
Passed the JavaScript code to the V8 engine.
Executed the code.
Printed output to the terminal.
There is no browser involved.
This is JavaScript running directly on your machine.
Writing Your First Hello World Server
Now let us build a very basic web server using only Node's built-in modules.
Open app.js and replace its contents with:
const http = require("http");

const server = http.createServer((req, res) => {
  res.statusCode = 200;
  res.setHeader("Content-Type", "text/plain");
  res.end("Hello World from Node.js Server!");
});

server.listen(3000, () => {
  console.log("Server running at http://localhost:3000/");
});
Save the file.
Running the Server
In your terminal:
node app.js
You should see:
Server running at http://localhost:3000/
Now open your browser and go to:
http://localhost:3000
You will see:
Hello World from Node.js Server!
What Is Happening in This Server Code
Let us understand it step by step.
1. Importing the HTTP Module
const http = require("http");
Node provides built-in modules.
The http module allows us to create web servers.
2. Creating the Server
const server = http.createServer((req, res) => {
This creates a server object.
The function runs every time someone visits the server.
req→ The incoming requestres→ The response we send back
3. Sending a Response
res.statusCode = 200;
res.setHeader("Content-Type", "text/plain");
res.end("Hello World from Node.js Server!");
This means:
Status 200 → Success
Content type → Plain text
Send message to browser
4. Starting the Server
server.listen(3000, () => {
  console.log("Server running...");
});
This tells the server:
Listen on port 3000
When ready, log a message
Stopping the Server
To stop the server:
Press:
Ctrl + C
in the terminal.
Key Things You Have Learned
You have now:
Installed Node.js
Verified installation
Used the Node REPL
Created a JavaScript file
Executed it using the
nodecommandBuilt and run a basic web server
All without using any frameworks.
What This Means
You now understand that:
Node.js runs JavaScript outside the browser.
You can execute JS files directly.
You can create servers with built-in modules.
You interact with Node using the terminal.
This is the foundation of backend development using Node.js.
Conclusion
Setting up your first Node.js application is simple but powerful. By installing Node, verifying it in the terminal, exploring the REPL, and running your first script, you move from browser-based JavaScript into full server-side development.
Writing a basic Hello World server shows how JavaScript can now handle network requests, respond to clients, and act as a backend system.
Mastering these foundational steps prepares you to build larger applications in the future, starting from a strong understanding of how Node.js works at its core.